Showing posts with label bread. Show all posts

Thursday

Dad's Banana Bread

Baking Banana Bread was something my Daddy did very well. I had finally gotten him to give me the recipe and I made little loaf's for the Holiday gift giving. I have this notion that our parents make things and we think they are the best in the world. Truth be told it is just the love and time they put into it that makes us love it so much


I looked at other recipes for banana bread and the results were really almost identical. But Love is the key to family and baking and cooking.

***When ever a banana starts to get over ripe I bag it and put it in the freezer for baking

Banana Bread Ingredients

  • 1 3/4 cups of flour
  • 2/3 cup of sugar
  • 2 teaspoon baking powder
  • 1/2 teaspoon baking soda
  • 1/4 teaspoon salt
  • 1 cup mashed banana - - good and ripe
  • 1/3 cup of shortening
  • 2 tbsp. whole milk
  • 2 large eggs
  • 1/4 cup chopped walnuts

Daddy's Banana Bread


In a large bowl sift all your dry ingredients and set aside.

When I bake I like to get all my ingredient's together and ready. This way I can add and make my batter with out having to get this and that.

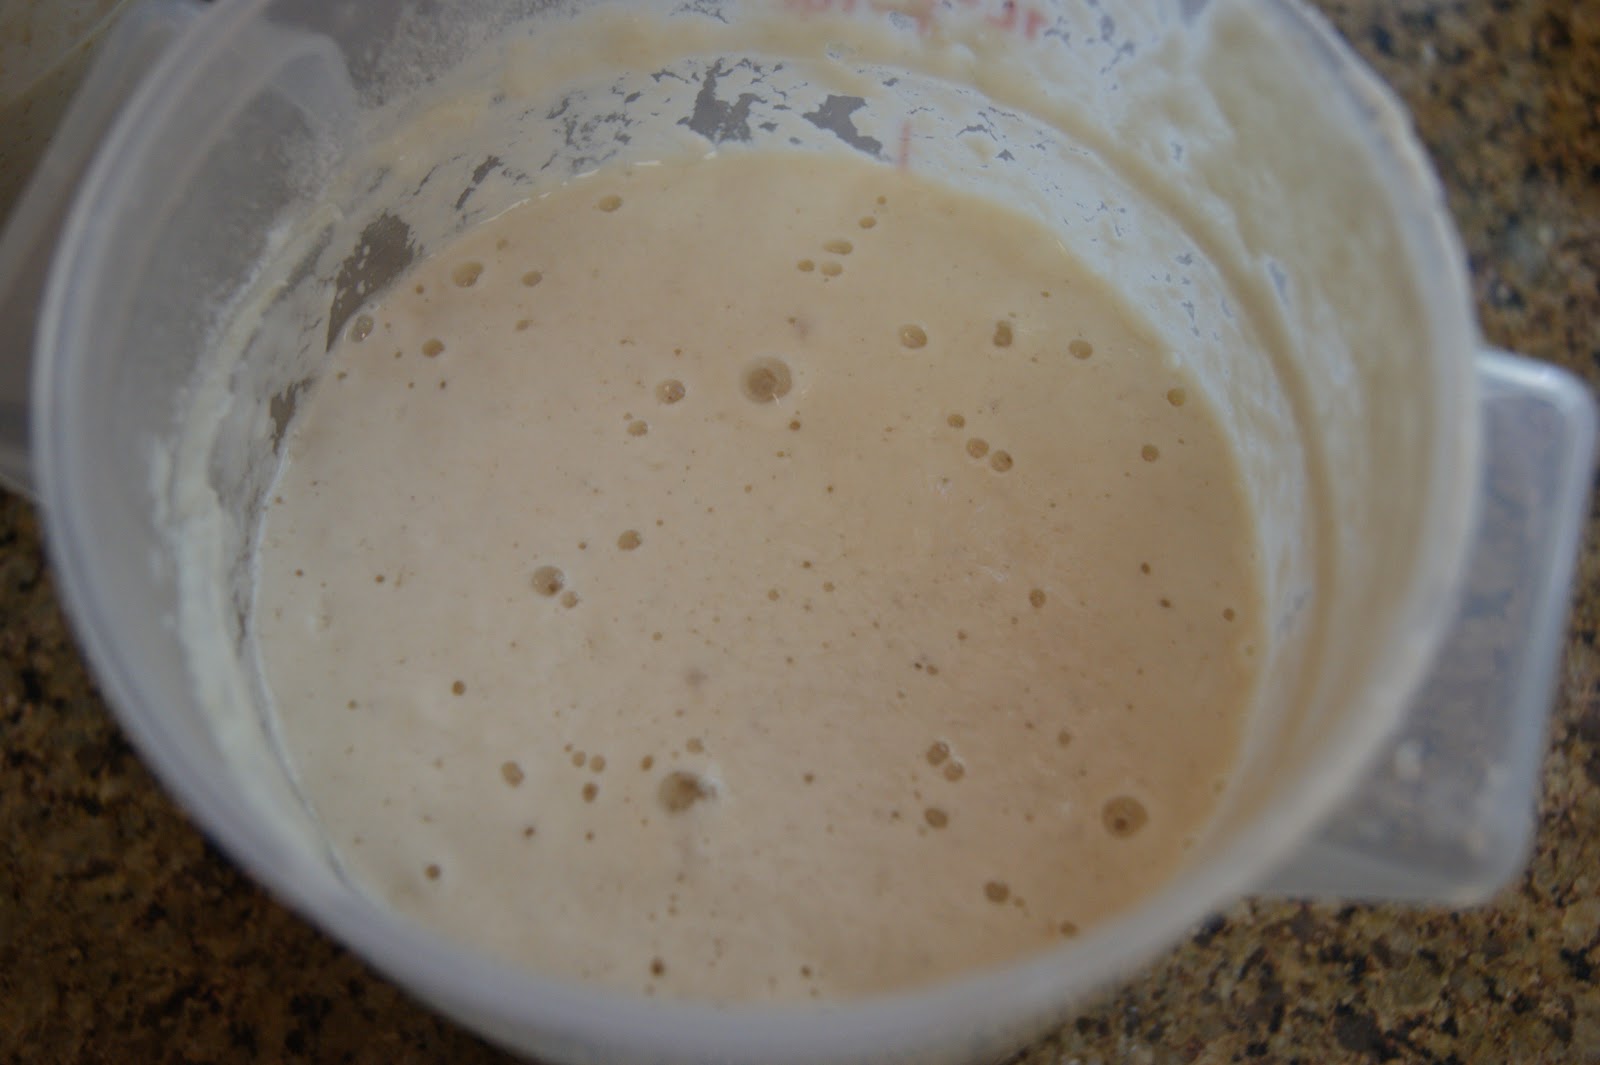
With an electric mixer beat the banana, shortening, and milk


Add the eggs (one at a time)  mix completely prior to adding the second egg


FYI the reason I sift all my dry ingredients together in a separate bowl so there are no pieces of flour that need to be broken up.

Add the flour mixture slowly into the mixer making sure each entry is fully mixed in. Once everything is mixed fold in your walnuts.


Grease and flour your baking pan/pans. Pour your batter into your baking pan. I usually make more batter than needed thus as you see extra big muffins came with this batch

Bake your banana breads accordingly. This mean the oven is at 350 degrees. If it is a regular loaf pan cook for approximately 45 to 60 minutes. I baked mine for 45 but kept an eye on it  Look when it starts to get a beautiful brown top put a toothpick through the top and if it comes out clean you are good to take them out.


Let them cool on a wire rack and Enjoy

Moist Leftover Fruit Bread/Cake


This cake is the best cake I ever ate. It is moist beyond any cake I ever made. It is delicious with the nice variety of leftover fruit I had to use. And I think the touch of yogurt was what really hit the moisture level I got. I love to watch cooking shows but hate going to most websites because they have more pop ups and advertising then I need. I will watch and write a recipe while watching the show. 


I don't always get all the ingredients and rarely check the site to make sure. I just write it on a napkins run to the kitchen and cook. After cooking it I did check to the site and yup she missed a few ingredients (or she left out) this one I grabbed from Pioneer Woman on TV and noted it was not the same as she had on the website but mine turned out heavenly so those missing ingredients and measurement made this cake awesome. 

Lets get started ....


Ingredients

  • 1 1/2 cups of flour
  • 3/4 cup sugar
  • 1 stick of butter (softened)
  • 1/2 small container of plain yogurt 2.5 ounces
  • 1 tablespoon of vanilla extract
  • 1 tsp baking soda
  • 1 teaspoon salt
  • 1 old banana
  • 1/2 cup approximately of blackberries
  • 1 cup or so of blueberries
  • Preheat your oven t 350 degrees


** Remember this is fruit that you need to use or put in the compost pile tomorrow. So use that brilliant head of your's to know how much. You got this!


To the left is my old fruit. I guess-da-mated


Alright the only tools you need is a large bowl and a tool to mix with. I did not use my mixer it
really was not necessary. Smash your banana and have it ready. Take your butter, sugar and vanilla, egg and mix together. Once mixed add your banana then the flour, baking soda and salt. I sift my dry ingredients into the batter this way there are no lumps. 


Make sure you mix your berries into some flour this will help them not to sink while cooking. 


Just toss them with about 3 tablespoons of regular flour. 


Once they are coated with some flour just gently add them to the batter. Mix it together be gentle at this point. Just toss them with about 3 tablespoons of regular flour. 


Your cooking pans should be sprayed with some kind of oil. Then if you want add parchment paper. I do because it makes the bread easier to remove from the pan. Cut a piece of parchment paper and lay it into the pan let it fall over the long edges of the baking pan. Like the picture yes I cut my just a bit to long. But it worked well anywho.


Alrighty now pop it into the oven and bake for 50 + minutes. Use a toothpick to pierce the center to make sure it is done. When you bring the toothpick out of the bread it will be clean.


Let the bread cool for about 20 minutes and then transfer it to a rack or plate of you have no rack. I never seem to be able to wait and I cut into it in the first 15 minutes. Granted that many times it falls apart but it is so delicious even crumbled a bit. And butter helps it stick.  

Enjoy! 


Super Moist Banana Bread Recipe


This recipe is one of the most moist Banana Bread I have ever made. I do know it is the buttermilk that makes the difference. What I did do is make a second recipe using my usual recipe to see if there is any real difference. In my years of cooking I have found that sometimes the ingredients give or take make a big or no difference. This one was Big!

Ingredients

2 ripe bananas mashed
1/2 cup of granulated sugar
1/2 cup brown sugar
3 eggs
1 tablespoon vanilla extract
1 cup of buttermilk
1 1/2  cups all purpose flour
1 tsp baking soda
1/2 to 1 cup walnuts (optional Chocolate Chips)
* Preheat your oven to 350 degrees
*Grease and flour coat a 9x5 inch pan


I know having everything ready prior to starting any cooking project this works best for me. So with that I have smashed my banana. I used a potato masher but a fork works just as well.


A couple of tips for baking. Always sift the dry ingredients. When you do the flour has no lumps and the baking powder and soda are incorporated. Yes it is old but it works. Thank you
Nanny ! 


I am a stickler about shifting the dry ingredients and mixing the wet ingredients thoroughly.


The tool you see me using on my bananas is my potato masher. I use this for everything from baking to preserves. This is getting to be more like a tool show then banana bread recipe.


Now let us start to incorporate the ingredients. 


To start in a large bowl or mixer stir together the softened butter and the sugar. Next in a small bowl mix up your eggs, buttermilk and vanilla extract mix well and then add this to your butter mixture and combine.  I like to mix some of my ingredients separately then combine this make me sure that everything has mixed well. Nothing worse than a chunk of brown sugar that did not dissolve or a pocket of flour that needed sifting.


Now it is time to gather and join all the ingredients together and add your bananas and walnuts. Mix them until well combined.  Have your baking pan ready and the oven warmed up. Pour the mixture into the baking pan and put it into the oven. Cook for 30 minutes and check the doneness with a toothpick. If not done give it 5 more minutes at a time. Remember less is better. 


Cool on a rack and cut and serve. 


Sunday

How to make Tartine Bread Starter

I have taken my baking to the next level. Kind of like an over-eater or alcoholic I'm obsessed. Now I have made Sourdough in the past and been satisfied but now it is a battle with myself. My original sourdough turned out ok if you ask me. The rye bread well how do I put it boring but good rye.

So now I set off for Bread Alley my own kitchen. Yesterday I did try to make a loaf and one stuck to the pan. The other is good and tasty but the size of a half cantaloupe.


Do not get me wrong I have made some delicious bread's but I am a girl who wants better than the last attempt. Does that make sense?

So here we are day two the starter is back out of the refrigerator. I do make a mean loaf of Country Bread from a book I purchased in San Francisco called Tartine Bread. I bought it on one of my visits to  my daughter "Ms.Independence" on the Island of Oakland.


This is my Tartine Adventure in Bread Baking thank you for joining me.


Well by now it is day three I have spent most of the morning reading a website Azelia's Kitchen the site is brilliant and just a wee bit more understandable yet I must be a word dork. I am really making my starter by smell and bubbles. She has gotten me closer to an understanding but again I have both my starters out now. Her website breaks it down so you completely understand the making as well as the science.


So with everything ready here I go. Here is the Recipe to get your starter going. You need two Quart wide mouth mason jars or comparable plastic or glass no issue. I just do as much stuff with glass. Not big on plastic but that is another post.


Tartine Starter from the Book!

To make a Starter you need Culture. No not personal Culture Starter Culture. The Culture is created by flour and water being combined.  The combination of the wild yeasts and bacteria present in the flour, the air and your hands begin the fermentation immediately. After this all begins you just need to feed your Starter.


I have made starter from powder San Francisco starter I sent for to try all ways and it to turned out great. You will need 5 pounds of flour this seems like a lot but you are going to use it to build the starter and feed it.  Half all purpose flour and half whole wheat flour mixture.


Alright to get started you will mix in a quart wide mouth mason jar or a small clear container that you can see through. Fill halfway with warm water.


Now add a hand full of your 50/50 flour mix to the water and mix  to achieve the consistency of a thick pancake batter with no lumps.


Use a dough spatula to clean the clumps off  the sides of the container. Cover the container with a kitchen towel and put it in a cool, shady spot for 2 to 3 days. After 2 or 3 day's you should have some bubbles like the picture to the right. If not give it a few more day's.


After 2 or 3 day's check and see if any bubbles have started to form around the sides and in the middle.  If not let it sit for a couple more days. Stir it


Once the starter has a film on the top and you pull it back and it is bubbly and smells like stinky cheese and has a sharply acid taste you are ready to start feeding your starter. Fermentation has started your ready for Lift Off!


To feed the starter you will need to remove 80 % of it. Replace it with equal amounts of warm water to the 50/50 flour mixture.
Do not worry about the quantities in these feeding you want a thick batter. Like a good thick bubbly pancake batter.


You want to repeat this process every 24 hours  As the volume of the batter increases you will notice the batter becoming bubblier and thicker. Your bacteria is growing.


This process is daunting but worth the effort. In the end you will have a starter you an use for years to come. You can also share it with other like minded baker people. The picture to the left is a beautiful starter and yes it is mine! Proud Mother Starter!


Well the next post will take you through the Making of the Leaven and the Dough


Look  at the pictures they look pretty darn good. But just not good enough for me! If you are a baker you know what I am talking about. I have many a satisfied eater but it is like at Thanksgiving and someone says "You carve the turkey you do it so well" what you meant to say was "You carve the turkey because no one else wants to do it"

Swedish Rye Bread Supreme


Seedless Rye Bread was a must this Irish Holiday. Mama lives here now and she has diverticulitis no seeds. I have a small breads book and one of many that had rye bread recipe's. The book is called Homemade Bread by Nell Nichols. Part of the Farm Journal .


Ingredients for Swedish Rye Bread Supreme

1/4 cup brown sugar
1/4 cup molasses
1 tablespoon salt
2 tablespoons shorting
1 1/2 cups boiling water
1 pkg active dry yeast
1/4 cup warm water (110 degree to 115)
2 1/2 cups rye flour
3 1/2 cups sifted white flour

* This makes two loaves


Combine brown sugar, molasses, salt and shortening into a large bowl.


Pour in the boiling water and stir until the sugar is dissolved.

Set aside to cool to lukewarm.


Sprinkle the yeast into the warm water and stir to dissolve.
Sift the rye flour prior to measuring it.
Measure it and add it to the sugar-molasses mixture beating well.


Stir in the yeast and beat until it is smooth. *I did this bread by hand and half way through I wished I had used my Kitchen Aid.


Mix enough of the white flour, a little at a time, first with a spoon and then with hands. Make the dough smooth soft dough.


Turn onto lightly floured board. Knead until satiny and elastic, about 10 minutes.


Place the dough in a lightly greased bowl, turn the dough once to grease top.
Cover and let it rise in a warm place until dough is doubled .This takes about 2 hours.

 Once it has risen punch it down. Turn the dough onto a lightly floured board and divide in half. Round up the dough to make 2 balls. Cover and let it take a 10 minute nap.


Shape the dough and place into loaf pans. Cover and let them sit for another 2 hours again let it double in size.  The loaf in the pan is half of the original . Let your oven 375 degrees and bake the loafs for about 30 minutes. If they get to brown on the top just cover them with aluminum foil the last 15 minutes of baking.


If you want a softer crust brush the loafs with melted butter while they are warm.

Also you can always add the seeds I had to do seedless for Mama! 


Monday

Rye Bread


All my breads are started with my Mother Starter. I got it from a friend about a year ago. With this starter I can make bread for a lifetime. It is something that every cook should have "A Sour Dough Starter" and it is a breeze to keep. Once you have a good starter you need only keep it refrigerated and every time you use it you will feed it. I have my San Francisco Sourdough recipe is here it took time to perfect it.

 Here is Rye Bread for now


Rye Bread


1 cup sourdough starter, at room temperature
1 1/2 cups rye flour 1 1/4 cups warm water.
1 cup whole wheat flour
1 3/4 cups all purpose flour, plus 1/2 cup all purpose flour
1 teaspoon salt
1 tablespoon sugar
2 1/2 tablespoons caraway seeds


Combine starter, rye flour, and one cup of the water in a large bowl. Stir to blend. I like an extra-sour flavor (like my sourdough) I cover mixture with plastic wrap and let it sit in a warm place over night or 6-12 hours until bubbly and sour, even boozy, smelling.


I start my dough right before I go to bed so that the next day I have fresh bread for dinner. After the mixture has rested 6-12 hours start by Combining

1 cup whole wheat flour
1 3/4 cups of the all-purpose flour
salt, sugar, and caraway seeds

I use my Kitchen Aid stand mixer on low speed until dough comes together.


Knead 9-10 minutes in Kitchen Aid stand mixer on speed #2 until dough is smooth and springy * add more all-purpose flour, a tablespoon at a time during the kneading process as needed to reduce excess stickiness (this particular dough will remain somewhat sticky)


Place in a large bowl cover and let rise about 1 - 1 1/2 hours in a warm place until doubled. Punch down dough and knead a few strokes to release air.


Shape into a round loaf and place on a greased baking sheet.
Cover loaf lightly and allow to rise about 1 hour until almost doubled.


Once your loaf has doubled spritz it with water and put in a 400 degree oven. Cook for 15 minutes then turn the oven down to 375 and spritz once more with water. Continue cooking for about 30 minutes or until top is crisp.


The water makes the crust crunchy. If you want a lighter crust not so crunchy do not spray it.


This is delicious rye bread.  Crusty crunch from the outside with Ryelicious inside.

Grandma's Bread Pudding

This Bread pudding at first I said wait a minute I use way more fattening stuff in mine but I did by the book and it turned out really well.

I did however grab a sauce off the internet but did not add the Rum or Whiskey it called out for. If I was going to put it in well to buy a whole bottle of booze for 2 tablespoons hummm not quite what I thought , well truth be told I would just drink the whiskey and forget the pudding.


Now I know I like to bake it the exact way it is in the book but there are exemptions. First I had to toss in a few raisins. I love raisin so there.


Also, the recipe called out for smashing the bread until it is pulverized. I left some piece's a bit larger than called for not to many just a few.


Cookery for Today...........1932

Bread Pudding


3 cups of stale but not dry bread
1 quart milk
1/4 teaspoon salt
2 eggs
1/2 cup sugar
1 teaspoon vanilla


Soak the bread in the milk until it is very soft, then mash it fine.


Heat together until nearly boiling. Beat the egg until light and add to them the sugar, salt and vanilla.


When well mixed, stir this into the bread and milk, pour the whole into a earthenware baking-dish.

Set in a pan of water, and bake three-fourth of an hour in a rather slow oven.


This book did not have a sauce recipe so I grabbed one from All Recipe

Vanilla Sauce

  • 1/2 cup light brown sugar
  • 1 tablespoon all-purpose flour
  • 1 pinch ground cinnamon
  • 1 egg
  • 2 tablespoons butter, melted
  • 1 1/4 cups whole milk
  • 1 pinch salt
  • 1 tablespoon vanilla extract


For vanilla sauce, whisk 1/2 cup of light brown sugar, the flour, a pinch of cinnamon, 1 egg, 2 tablespoons of melted butter, 1 1/4 cups of whole milk, and salt together in a heavy saucepan until smooth.


Heat over medium heat, whisking constantly, until thickened and the sauce coats the back of a spoon, 10 to 12 minutes.


Stir in the vanilla extract.


Pour sauce over warm bread pudding, or serve on the side in a bowl.