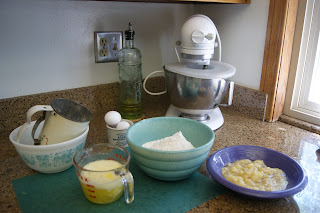
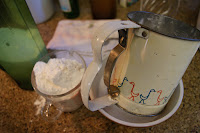
Monday

Veggie Lasagna


I love chicken but today I thought since my friend is a veggie-tarian I would try this with out the chicken. Now if you want the chicken just two cups chopped chicken added to this if you need to... but on it's own yummmy.


Most of my ingredients come from the backyard but I have made the recipe instructions with can amounts to make it easier for those who do not have a working garden. But you must get your gloves on and start one. If you need tips on gardening go to my gardening website.


Some things I do not do. I do not use tomato sauce the chopped tomatoes have just enough juice to keep the flavors  see the picture (not professional) of the lasagna on the plate notice that there is not a ton of red sauce.


Veggie Lasagna

Ingredients
2 cups chopped broccoli
3 large carrots sliced (not to thick)
1 onion chopped ( I use red it is sweeter)
3 chopped garlic heads...more or less
4 to 5 sprigs of fresh oregano
1 teaspoon of white sugar - this cuts the acid in the tomatoes
salt and pepper to taste
1-2 teaspoon of red pepper flakes - this gives it a little bite so if you do not like spicy skip it
ricotta cheese (Choose your amount)
mozzarella cheese (Again as much as you like )
chopped tomatoes one 4 oz can or two cups fresh
approximately 10 to 13 lasagna noodles soaked in warm water for 10 minutes

I keep most of my chopping bite size I like to taste my food in every bite not try to figure out
what I just bit into.

How to:


I microwave my broccoli just a touch for about 2 minutes to make them just not so stiff when added. Or chop it up tiny ..hey that works...


Put a smidgen of olive oil in a large pan and grill the onions and garlic, oh say 10 minutes until they are soft but not brown. Now add the tomatoes and the sugar and salt, pepper and pepper flakes if desired and simmer together about 5 minutes. 


Add the carrot's and the oregano I have large pieces of oregano that I simmer with the onions and garlic....then remove when I assemble the lasagna but you can chop it up and leave it in. I do add a few chopped pieces when assembled.


Ok lets layer! A layer of noodle overlap then by about a half inch then a layer of veggies some sauce and some cheese and then add another layer till you have come about I say one inch from the top.


Your last layer should be noodles. Then you want to top the whole thing off with a nice dabble of sauce, then cheese more sauce and more cheese.


This will make a wonderful crusty top. Just follow the pictures they tell the whole story. 


If you layer it to much to the top it will bubble over and that is not fun to clean off the bottom of the store and it smells. I always put a cookie sheet under what I cook because it is bit of cleaning insurance.


Alrighty now bake the lasagna in a preheated oven of at 350 degrees, covered in foil, for the first 15 minutes, then remove foil and continue baking for 20 minutes. What you are looking for is bubbly when the foil is removed...then a brown top crust like the bread you are going to serve with it...

Note: I am the type of cook that believes that you need to make some decisions on your taste...The veggies put in what you love. The cheese I am not a big cheese head so I put less cheese more veggies...Please go with your own taste and you will see that is what makes it yours...Get personal with your food...
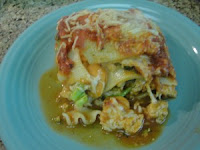
And WaLa


Sweet and Tangy Cabbage Slaw

So I am out in my garden. I am getting ready to pick my cauliflower and so I do. I head over to the compost bin and start to peel it so I can get it clean to take it in the house. 

So I am peeling and peeling and peeling and it dawns on me this is not cauliflower it is cabbage. I was laughing so hard at myself which I do a lot of.  I took my cabbage into the kitchen and made this little salad. Boy my garden needs to have some veggie labels. This recipe is for about 12 servings. If I knew it was going to be this delicious I would have made more it was gone in a heartbeat.


1  head of red cabbage chopped
1 head of green cabbage (note mine is from my garden which is the inspiration for the salad) chopped
4 to 6 scallion onions sliced
1/2 cup raw peanuts crushed
1/2 cup of Apple Cider vinegar
1/3 cup of sugar
1/4 cup fresh squeezed orange juice
1 teaspoon red crushed pepper 
3 tablespoons of olive oil


The only picture I have ! 


Chop your cabbage and onions I like chopped salad you can chop or shred your cabbage put this in a large bowl. In a small saucepan on the stove over medium heat combine vinegar, sugar, orange juice and red peppers stirring until the sugar has dissolved. Remove from heat and whisk in the olive oil. Let it cool down I pop it in the freezer for 5 minutes or so... Now pour it over the cabbage and refrigerate for 15 minutes or so so it can soak up the flavors..

This salad was delicious and crunchy. The tart and sweet was amazing. You can adjust your flavors to your own taste. Enjoy!

Split Pea Soup

 This Recipe for Split Pea Soup has a long history. Nanny Lilly taught me how to make it she learned from her Mother in Poland. Split Pea Soup is a comfort food to me. I will bake some fresh bread and sit and enjoy this Split Pea Soup next to a nice warm fire. Enjoy xoxo


This Split Pea soup I adore and who would have thought that I would. Nanny Lilly use to make this soup and she won my palate over. I have such fond memories of this woman and with my cooking there is not a day that I not think of her and the incredible meals she would create.
No matter when you went to Nanny Lilly's home she always had food waiting or she would grab it out of the freezer. I know she is watching me and is proud! This is large batch cooking. You can cut this recipe in half. I Pressure Can for the year
 
                                                                  Ingredients


One ham bone with scraps
*Mine is frozen from the holiday dinner with ham scraps. I seriously tell neighbors to save their ham bone for me.
2 bags of split peas - 16 oz each - (cleaned and drained and soaked overnight )
8 + Quarts chicken broth/stock
finely chopped white onion
finely chopped garlic cloves
6 carrots chopped and finely diced
2 bay leafs 
Seasonings to taste including salt and pepper
 
Put your peas in a strainer and clean. Once cleaned put them into a  large bowl and let them soak for at least three hours or overnight.


Place your ham bone, ham pieces and broth into a large stock pot and cook on simmer for three hours.

If you plan on canning use Stainless Steel Pot. 

I take my time with this soup the longer it cooks the better the taste.


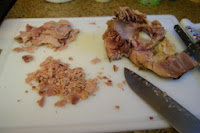
Once the stock is cooked I take my bone out and scrape the meat off and chop it. Removing any skin, grit or fat remaining.


I then replace the bone and the meat into the stock. I will then add my seasoning. Use the seasoning you like. I let people add salt and pepper to taste when they are serving themselves. 

I see a lot of recipes that call out for chopped onions and garlic. My garlic and onion are so small you would not know they are there except in taste. I like my soup thick and clean no bit's except for my ham and carrot.

Now add your carrot. Simmer your soup until it is the consistency you like. I keep an extra bag of peas just in case I want it thicker.

 
I use my immersion blender to blend the soup.


I let my soup sit overnight.
What ever we do not eat I pressure can the next morning.

Here is the link to Pressure Can your Split Pea Soup 

Soup is a great go to meal. You can freeze this soup also.

Friday

Peachy Buttermilk Muffins


During the Summer Season wh
en fresh fruit is abundant. Peaches are delightful and sweet. I love using buttermilk or yogurt in any of my baking recipe's. Either one always makes any cake, cupcakes, muffins so light and moist. 


Ingredients

  • 4 eggs
  • 1/2 cup soften butter
  • 3/4 cup granulated sugar
  • 2 tsp vanilla extract
  • 1 cup yogurt
  • 1 cup buttermilk
  • 2 1/2 cups all purpose flour
  • 1/2 teaspoon baking soda
  • 1 teaspoon baking powder
  • 1/2 tsp cinnamon
  • 2 cups freshly diced peaches
Preheat your oven to 375 degreez


The first thing you want to do is mix the 
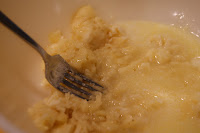
eggs, butter, sugar and vanilla.  In a large mixing bowl add these ingredients and mix this up until the sugar has dissolved. 


I run my finger through the mixture and taste the granules should have dissipated.

Now you can add your yogurt and butter milk to the mixing bowl. As a side note there are more ways to make muffins then you could imagine. I have done my Banana Muffins for years with half the ingredient's but I love to experiment and these were worth it.


Chop your peaches. Use fresh the frozen are to wet for muffins or baking. I always chop more than needed and freeze for other recipes. It is good to do while they are in season.


Once this is all mixed well move on to sifting your dry ingredients into a separate bowl. Sift the flour, baking soda and powder and the cinnamon. I always sift my dry ingredients together this way everything is mixed evenly.


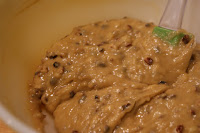
Now is the time to add your peaches. Add the peaches last and mix by hand. I like to mix by hand because this way I do not smash or rip the peaches I want whole bites of peaches.


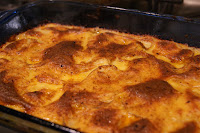
Once well mixed you can pour the batter into greased muffin tins. Bake for 18 minute's or so. Keep an eye on them as every oven is different with the amount of heat it generates. This recipe should give you about 24  standard muffins or 6 to 12 jumbo muffins. 

An added bonus on these muffins is to add a crumble top. You want to add the crumble prior to cooking them. The ingredients are as follows and so easy adding a crunch on top of your already delicious muffins.

Crumble Topping

1/4 cup melted butter
1/3 cup flour 
1/3 cup brown sugar
1 tbl white sugar
1 tsp cinnamon

Mix all the ingredients together and top the muffins. Top muffin's prior to putting them in the oven to cook. 

Scalloped Potatoes

Scallop Potato's one of my favorite side dishes. I do make big batches but there never seems to be any left. The taste of the fresh potato's and natural ingredients makes all the difference.

My Granny use to make this recipe and I wondered how can she put evaporated milk in that recipe? Well did it matter when I ate almost the whole thing! 


Ingredients
  • 6-8 potatoes (sliced thin)
  • 1/2 onion (diced) Any onion will do
  • 1 can evaporated milk + 1 can of water
  • 1/2 to 3/4 cup flour
  • Parsley and/or dill weed
  • 1 stick butter

Preparation


Layer sliced potatoes, 4-5 pats of butter, and onions, seasoned with salt and pepper to taste, in 9x11 casserole dish. Repeat layering until all potatoes are used.

I use a mandolin to slice this way they are perfect. 


I do not peel my potatoes. I do not even peel them for mashed potatoes they are full of so many great vitamins. The skin has more nutrition and fiber then the inside of the potato. Who would have thought. 


Heat evaporated milk and 1 can of water together in in a small sauce pan. Yes, that is Hungarian Paprika I added just a bit love the flavor it gives the potato. Personal choice. Warm the mixture until mixed.


Sprinkle 1/2 to 3/4 cup flour on top of layered potatoes.


I sift the flour on the potatoes to avoid lumps


Pour the liquid over your potatoes and bake in the oven at 350 degrees for approximately 45 minutes.


Once your potato's are done you have the option to add cheese to the top and return them to the oven for an additional 15 minute's to melt the cheese. 


This recipe is very Old School and will not look like the boxed brand but they are delicious. Enjoy 

Saturday

Banana Toasted Pecan Cake


This cake looked so delicious in the book and I happened to have a few left over bananas from smoothies. I am giving you the picture of what the cake should look like and what it actually looked like at my home. Now mind you I baked it 2 different times to make sure I had it right.


For me this cake turned out more like a Banana Hockey Puck. I am giving you the whole recipe word for word so hopefully someone will please prove me wrong. 

Ingredients

  • 3/4 cup all-purpose flour
  • 1/2 teaspoon baking soda
  • 1/4 teaspoon kosher salt
  • 1/4 teaspoon cinnamon
  • 1 large egg
  • 1/2 teaspoon vanilla extract
  • 1/2 cup firmly packed brown sugar
  • 3 tablespoons unsalted butter. melted
  • 1 banana peeled and mushed
  • 1/2 cup pecans


Toast your pecans and let them cool. 


Line the bottom of a round pan that fits the Instant Pot (bought separately) Lightly grease the sides of the pan and place a round piece of parchment paper in the bottom and set aside. 


Sift together the dry ingredient's all but the brown sugar.


In a bowl combine banana and the butter mix thoroughly. 


Beat in the egg, vanilla and brown sugar until well blended. 


Yes indeed that is a hand blender. 

Add the flour mixture until it is completely absorbed. 


Last mix in the pecan's


Pour the batter into your pan 


Preparing your Instant pot. Put 2 cups of water into the Instant Pot. 


Lift  your cake pan and place it into the Instant Pot you can place a wire rack with handles to lift it out (bought separately) but not necessary unless your pan leaks. 


You could use aluminum to make a sling/lift type thing to put around the pan to lift out. Get creative. 

Secure the lid of your Instant Pot and set the Pressure Release to Sealing. Keep in mind the Pressure Release Value and Sealing Value (same valve) are very flimsy you will think this is not right but it is ok. It has a lot of give. 

Select the Manual Setting and set the cooking time for 30 minutes at high pressure. This setting and buttons took me a LONG time to get right. It is more like a timing thing do it right away. 

Once the timer has gone off let the Instant Pot sit for about 15 minutes and then move the Sealing/Pressure Vent to Venting and release the remainder of the steam. Open your Instant Pot carefully remember it is full of Hot Air so twist to open and tip the lid away from you to open. 

Once open you will see your finished cake. I went onto shock thinking the cake was a wet blob of dough. I touched the top and it was cooked. 


So I removed the "cake" and let it cool for 15 minutes. Once cooled I took it out of the pan and place it on the plate. Humm interesting. 


This cake was a circle of what I could have used as a walking stone in the yard. Trust me no amount of whopping cream or butter could have soaked into this. 


The picture next to this is mine compared to the one in the book. Now this was an Instant Pot Book made for Instant Pot by an Instant Pot user. 


I am going to make another few recipes from the book but do not want to bash a book that I personally think is crap because others may do great with it. 

Ok next I am going to attempt to steam a few vegetables. Simple enough you would think! 

Monday

The Instant Pot

Instant Pot one of the modern creations I have yet to hear one bad thing about this machine. I am going to give you a little history on Lani Cooking. As most of my readers know I have been cooking since I was very young. No I was not in the kitchen by my mommy side when I was young but was lucky enough to spend many summers up in Paradise with my Grandma. 


She was a cook from way back. It use to be just a stove or what ever else held fire. I have many tools and appliances I use in my kitchen in my opinion a seasoned cook will find it hard to replace many great skillet, Crock Pot etc recipes with an Instant Pot but we will find out what it does work great for. My opinion on any recipe is strictly "My Opinion" 

Alright lets go forward I am an avid cook. From old family favorite to preserving, pressure cooking, dehydrating you name it I have done it. I have to say I have done quote well and love the hobby. Now it is a new world and here comes the Instant Pot. So far I have had a couple of useful dishes a wonderful Corn Beef and Cabbage for St. Patty's Day.  I also made what was going to be meat sauce for spaghetti. I have dabbled in steamed vegetable's also.

Let us start with what I bought. Go big of go Home I got the Instant Pot Lux 8 Quart. I also have  Seal Saver Machine the best machine since the invention of the fire but that is another post. I also after one use of my Instant Pot got the Accessories Package. Filled with everything I already have but that will fit this machine. Oh and then there is the Recipe Book not an official Book just a random book by a girl who gave me only what she liked. Useless but pretty book. 

Well so far this has become a way to find something this machine can make me happy with. So many cooks adore and sing the praises of this machine. The Instant Pot is a Modern Pressure Cooker and not meant for many home cooked food as  have found out. It has advantages it does not warm the house up, It is quick. Actually it is a glorified Pressure Cooker with out the fear of blow up's. Keep your expectations in check with this appliance.   

Alrighty then this week we will start the Great Instant Pot Cooking Extravaganza !


Thursday

Dad's Banana Bread

Baking Banana Bread was something my Daddy did very well. I had finally gotten him to give me the recipe and I made little loaf's for the Holiday gift giving. I have this notion that our parents make things and we think they are the best in the world. Truth be told it is just the love and time they put into it that makes us love it so much


I looked at other recipes for banana bread and the results were really almost identical. But Love is the key to family and baking and cooking.

***When ever a banana starts to get over ripe I bag it and put it in the freezer for baking

Banana Bread Ingredients

  • 1 3/4 cups of flour
  • 2/3 cup of sugar
  • 2 teaspoon baking powder
  • 1/2 teaspoon baking soda
  • 1/4 teaspoon salt
  • 1 cup mashed banana - - good and ripe
  • 1/3 cup of shortening
  • 2 tbsp. whole milk
  • 2 large eggs
  • 1/4 cup chopped walnuts

Daddy's Banana Bread


In a large bowl sift all your dry ingredients and set aside.

When I bake I like to get all my ingredient's together and ready. This way I can add and make my batter with out having to get this and that.

With an electric mixer beat the banana, shortening, and milk


Add the eggs (one at a time)  mix completely prior to adding the second egg


FYI the reason I sift all my dry ingredients together in a separate bowl so there are no pieces of flour that need to be broken up.

Add the flour mixture slowly into the mixer making sure each entry is fully mixed in. Once everything is mixed fold in your walnuts.


Grease and flour your baking pan/pans. Pour your batter into your baking pan. I usually make more batter than needed thus as you see extra big muffins came with this batch

Bake your banana breads accordingly. This mean the oven is at 350 degrees. If it is a regular loaf pan cook for approximately 45 to 60 minutes. I baked mine for 45 but kept an eye on it  Look when it starts to get a beautiful brown top put a toothpick through the top and if it comes out clean you are good to take them out.


Let them cool on a wire rack and Enjoy

Monday

Lynsie Hallah


So Apron Strings girlfriend Lynsie now wife made a Challah (bread) and for a first attempt it was fabulous. The recipe came from the Food Network Magazine one of their contests. The winner was Aliza Schwartz of New Jersey. Yummy my babies use to get their Challah every Friday night which is Shabbat kind of of the Sunday dinner for the Jews. Alright so let us get right to the bread.


Now a couple of tips this bread was so big I think you could split the dough and get two loafs instead of one. But if you are having a family gathering or taking it to a party then one big one is okie dokie. Or freeze one.

Oh and get your ingredients all measured out ahead of time it is so helpful to have your stuff ready. It is what the chefs do and the cooking schools do. Either way this bread is delicious.


Chocolate Chip Challah Bread

2 packets active dry yeast (4 1/2 teaspoons)
1/2 cup sugar, plus a pinch
7 cups all-purpose flour, plus more for dusting
1 tablespoon salt
2 large eggs
1/2 cup vegetable oil, plus more for the bowl
1 cup semisweet chocolate chips


1. Preheat oven to 375*. Mix the yeast, a pinch of sugar and 1 cup warm water in a small bowl. Set aside while you measure out the other dry ingredients, or until the mixture is foamy.

2. Whisk 3 1/2 cups flour, the remaining 1/2 cup sugar and salt in a large bowl. Pour in the
 yeast mixture and stir with a wooden spoon. Add 1 egg, the vegetable oil and 1 cup of warm water: stir until combined. Gradually stir in the remaining 3 1/2 cups of flour until the dough starts to come together. Mix in the chocolate chips.

3. Turn the dough out onto a floured surface and knead until smooth, about 8 minutes. Transfer to a large oiled bowl, cover and let rise in a warm place until doubled in size, 1 hour to 1 hour and 30 minutes.

4. Divide the dough into 3 equal portions. On a floured surface, roll each portion into a ball, then roll each ball into a 1 1/2-to2-inch-wide strand, about 16 inches long. Lay the strands side by side on a piece of parchment paper and pinch together at one end.


5. Braid the 2 strands: Cross the right strand over the middle strand. Then cross the left strand over the middle strand. Repeat crossing the strands until all the dough is braided. Pinch the end together.


6. Slide the loaf (with the parchment paper) onto the baking sheet. Beat the remaining egg with one tablespoon water in a small bowl, then brush the egg wash all over the loaf. Bake until golden brown, about 30 minutes.