Saturday

Banana Toasted Pecan Cake


This cake looked so delicious in the book and I happened to have a few left over bananas from smoothies. I am giving you the picture of what the cake should look like and what it actually looked like at my home. Now mind you I baked it 2 different times to make sure I had it right.


For me this cake turned out more like a Banana Hockey Puck. I am giving you the whole recipe word for word so hopefully someone will please prove me wrong. 

Ingredients

  • 3/4 cup all-purpose flour
  • 1/2 teaspoon baking soda
  • 1/4 teaspoon kosher salt
  • 1/4 teaspoon cinnamon
  • 1 large egg
  • 1/2 teaspoon vanilla extract
  • 1/2 cup firmly packed brown sugar
  • 3 tablespoons unsalted butter. melted
  • 1 banana peeled and mushed
  • 1/2 cup pecans


Toast your pecans and let them cool. 


Line the bottom of a round pan that fits the Instant Pot (bought separately) Lightly grease the sides of the pan and place a round piece of parchment paper in the bottom and set aside. 


Sift together the dry ingredient's all but the brown sugar.


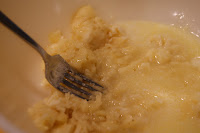
In a bowl combine banana and the butter mix thoroughly. 


Beat in the egg, vanilla and brown sugar until well blended. 


Yes indeed that is a hand blender. 

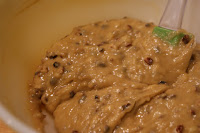
Add the flour mixture until it is completely absorbed. 


Last mix in the pecan's


Pour the batter into your pan 


Preparing your Instant pot. Put 2 cups of water into the Instant Pot. 


Lift  your cake pan and place it into the Instant Pot you can place a wire rack with handles to lift it out (bought separately) but not necessary unless your pan leaks. 


You could use aluminum to make a sling/lift type thing to put around the pan to lift out. Get creative. 

Secure the lid of your Instant Pot and set the Pressure Release to Sealing. Keep in mind the Pressure Release Value and Sealing Value (same valve) are very flimsy you will think this is not right but it is ok. It has a lot of give. 

Select the Manual Setting and set the cooking time for 30 minutes at high pressure. This setting and buttons took me a LONG time to get right. It is more like a timing thing do it right away. 

Once the timer has gone off let the Instant Pot sit for about 15 minutes and then move the Sealing/Pressure Vent to Venting and release the remainder of the steam. Open your Instant Pot carefully remember it is full of Hot Air so twist to open and tip the lid away from you to open. 

Once open you will see your finished cake. I went onto shock thinking the cake was a wet blob of dough. I touched the top and it was cooked. 


So I removed the "cake" and let it cool for 15 minutes. Once cooled I took it out of the pan and place it on the plate. Humm interesting. 


This cake was a circle of what I could have used as a walking stone in the yard. Trust me no amount of whopping cream or butter could have soaked into this. 


The picture next to this is mine compared to the one in the book. Now this was an Instant Pot Book made for Instant Pot by an Instant Pot user. 


I am going to make another few recipes from the book but do not want to bash a book that I personally think is crap because others may do great with it. 

Ok next I am going to attempt to steam a few vegetables. Simple enough you would think! 

1 comment:

  1. Amazing post. steam powered are very useful to keep your bbq grill clean. Keep sharing your post.

    ReplyDelete